
How to Make Unique DIY Polymer Clay Earrings with Wire and Liquid Clay
- Feb 12, 2024
- 7 min read
Updated: May 1, 2024
Today, I will show you how to shape wire into small shapes to create earrings that you will fill with a fun and unique liquid form of polymer clay.

Some of you might not know that polymer clay can come in a liquid form. And if you did, you might not know why or how you could use it…
What are some ways to use liquid polymer clay?
Liquid polymer clay is a versatile medium that can be used in various creative ways, especially in crafting and jewelry making. Here are some popular methods:
1. Surface Coating: Apply it as a glaze over solid polymer clay pieces to add a glossy finish. It seals the surface and can enhance colors.
2. Image Transfers: Transfer printed images onto clay surfaces using liquid polymer clay. The liquid clay acts as a medium that adheres the image to the solid clay.
3. Creating Skins: Spread thin layers on a baking surface and bake. These thin "skins" can be used for decorating or as a part of layered clay projects.
4. Embedding Objects: This technique is excellent for encapsulating small objects like glitter, metal leaf, or images in your clay work.
5. Painting with Clay: Mix liquid polymer clay with pigments or alcohol inks and use it like paint on unbaked clay surfaces.
6. Filling Molds: Use it in silicone molds to create detailed shapes and designs. It's particularly useful for intricate pieces that are difficult to shape by hand.
7. Adhesive: It can act as a strong adhesive between two pieces of baked or unbaked clay.
8. Mixing with Other Media: Combine it with powders, inks, and other materials to create unique effects and finishes. See my tutorial on making dragonfly wings using liquid clay and Pebeo paint.
9. Grouting for Mosaics: It can serve as a grout when creating polymer clay mosaics, filling the gaps between pieces and adding to the overall design.
Remember, when using liquid polymer clay, always follow the manufacturer's instructions for baking and safety guidelines. Experimenting with different techniques can lead to unique and creative results.
Today, we’ll mix it with alcohol inks and embed tiny resin fillers within the wire-shaped designs.

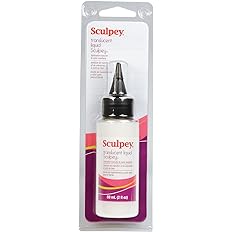
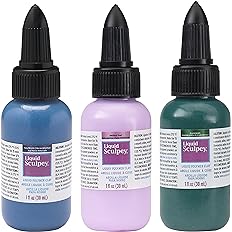
Liquid Sculpy Polymer Clay (comes in colors and translucent)
Various resin fillers, like crushed glass and large-sized glitter
DIY Polymer clay earrings tutorial:
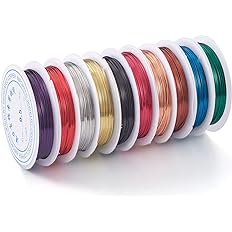
Step 1 - Cut wire

Cut jewelry wire about 4 inches long. I used a few different colors of wire to make these earrings. They were all around 24 gauge wire.
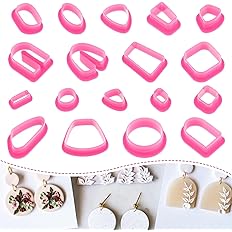
Use a small cookie/clay cutter to shape the wire

They make small cookie-type cutters that are usually used for clay. Start by shaping the wire around the edges of some simple shapes. Shape it in the middle of the wire so you have about an inch left at the ends.
Step 2 - Twist and cut the wire to make a loop to attach to earring hooks

Start by twisting the wire so they cross each other.

Continue to loop one of the wires around the other one.

Loop the wire completely around the straight one.

Loop around once more.

Cut the looped wire as close to the straight wire as you can. You can use small pliers to push them together.

Cut the straight wire to be half to 3/4 of an inch.

Use a round nose plier to loop the wire to create a rounded hook to attach a jump ring.

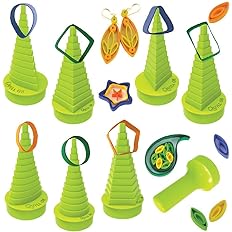
I also used a tool for paper quilling to make the shapes that I wanted:

How else can you shape wire for jewelry making?
Here are five effective techniques to achieve precise and creative wire designs:
Quilling Tools - Quilling tools, traditionally used for coiling paper, are excellent for creating tight, uniform spirals and curls in wire. Their slender, rounded tips allow for easy manipulation of the wire, enabling the creation of delicate and intricate designs.
Plastic Jigs - Plastic jigs come with various pegs that can be inserted into pre-drilled holes to form patterns, which are also used in paper quilling. You can create consistent shapes and complex geometrical designs by wrapping the wire around these pegs. This method is particularly useful for repeating patterns or when making multiple pieces of the same design.
Household Objects - Everyday items such as pens, forks, or bottles can be repurposed as makeshift tools for bending wire. This approach is great for achieving a wide range of shapes and sizes, depending on the objects you have at hand. It's a cost-effective way to experiment with wire shaping without requiring specialized tools.
Trace a Drawn Pattern - Lay your wire over a drawn or printed pattern and use it as a guide to shape the wire. This method allows for high precision and replicating any design you can imagine. It's especially useful for custom or intricate designs that require a specific shape or for replicating logos and text in wire form.
Cookie Cutters - Mini cookie cutters aren't just for baking; they can be excellent guides for shaping wire into fun, recognizable shapes. Press the wire against the edges of the cutter to mold it into shape. This technique is perfect for creating themed or seasonal jewelry pieces with minimal effort and maximum uniformity.

These are all the shapes I created using the tools.
Step 3 - Prepare the wire shapes to be filled with the liquid clay

Laying the wire shapes on a piece of glass with the hooks off the edge will help keep the liquid clay from spilling out as much.
Step 4 - Fill with liquid polymer clay

Fill in the shape with liquid polymer clay.

Liquid Sculpy comes in a variety of colors. I'll show you how to add color to the transparent kind next.
Step 5 - Bake the earrings and remove them from the glass

Use the instructions on the bottle of the polymer clay on how long to bake it.
Once it's done baking, take it out of the oven and let it cool for a few minutes. After that, use your fingernail or butter knife to Huntley gently unstick the clay from the glass or pan.
Here is that first pair of earrings:

If some of the clay gets on the wire, you can gently scrape it off.
Coloring transparent liquid clay
Add drops of alcohol ink into the clay

Fill in the wire with the translucent liquid polymer clay. After that, add a drop or two of alcohol ink onto the clay.
I recommend using a toothpick or something similar to swirl the ink around, resulting in a neat effect.

Here, I added a drop of metallic gold and silver and gave them a slight swirl with the end of the safety pin.
Add a variety of resin filler

Another thing you could do is add bits of resin filler to the liquid clay. They make a variety of resin fillers. In the above picture, I embedded bits of colored rocks.
Here's how they turned out:

It turned out awesome with the transparent clay.
What kind of fillers can I add to resin or liquid polymer clay?
Here are some items commonly embedded:
Flowers and Leaves: Pressed flowers and leaves can add a natural, delicate touch to your resin or clay pieces.
Glitter and Confetti: Glitter and confetti are perfect to add sparkle and celebration to your pieces.
Beads and Rhinestones: Embedding beads or rhinestones can add dimension and decorative flair.
Photos and Paper: Small printed photos or pieces of decorative paper can be preserved forever in resin.
Metal Charms: Tiny metal charms can add thematic elements or personal symbols.
Seashells and Sand: Tiny seashells and sand can create a beach-themed look.
Fabric and Lace: Small pieces of fabric or lace can add texture and a vintage feel.
Feathers: Small feathers can give a soft, ethereal appearance.
Microbeads: These can provide a caviar effect or textured look in your piece.
Crushed glass: crushed glass comes in various colors, including metallic.
Candy and Sprinkles: For a playful, colorful effect, small candies and cake sprinkles can be fun.
Miniature Figurines: Tiny figurines like animals or fairytale characters can create a scene or tell a story.
Cosmetic Elements: Elements like eyeshadow or blush can add color and shimmer.
Fossils and Stones: Small fossils, pebbles, or gemstones can give a piece an earthy, natural feel.
Electronic Components: For a tech-themed piece, small electronic components like resistors or capacitors can be interesting.
Insects: Real or imitation small insects (like butterflies) can be used for a natural history or gothic look.
Gold Leaf: Gold leaf flakes can add a touch of luxury and elegance.
Pigment Powders: Mica or other pigment powders can create marbled or iridescent effects.
When embedding items in resin or liquid polymer clay, it's important to ensure they are dry and free of any substances that could react with the resin or clay. Also, consider the placement and how the items will appear once the material is cured.
Trim any excess clay

If some liquid clay spills beyond the wire, you can carefully trim it off using scissors.


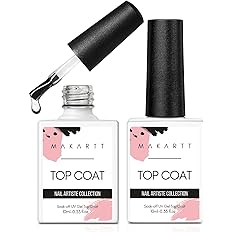
Coat earrings with clear nail polish

Use a type of clear topcoat nail polish to finish it off.

It gives it a beautiful shine.
See my tutorial on how to make earrings out of stickers for another glossy look.
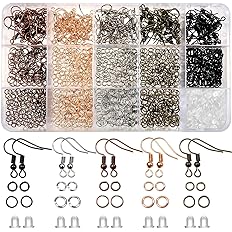
Add jump rings and earring hooks

My finished earrings:


And there you have it – handcrafted wire and polymer clay earrings infused with your personal touch and creativity. I hope you found this tutorial both fun and inspiring.
Don’t worry if it takes a few tries to perfect it; remember, every piece you create adds to your unique story as a maker.
Keep experimenting with different shapes and colors, and most importantly, enjoy the process.
Wear your earrings with pride or give them as thoughtful gifts to friends and family. Happy crafting!
Make sure you look at my other earrings and jewelry tutorials!
or


I enjoyed seeing how you created the wire wrapping. Thanks for sharing with Create-it link party.