
How to Make a Lacy Ribbon Cuff
- Nov 15, 2019
- 2 min read
Updated: Feb 14, 2023
I don’t sew a lot.
And sewing something frilly is not my style.
However…I have a ton of lace.
I like to add it to my mixed media pieces.
I thought a craft project including lace would be a fun way to use up my extra scraps.
And so I made a tutorial on how to make cuff bracelets to do just that - use my scraps.

Materials:
Ribbon
Lace or trim
Embellishments of choice

Step 1:
Paint fabric stiffener on the base ribbon and let dry.

Step 2:
Apply fabric glue to the velvet ribbon that is the same width or slightly smaller to your stiffened ribbon.
The velvet ribbon is put on so it’s soft next to your skin.

Step 3:
Fold the ends of the ribbon over about half an inch and apply fabric glue to hold the folded pieces.

Step 4:
Use a clip to hold the fold till the glue dries.

Step 5:
Add a ribbon clasp to the ends


Step 6:
Add fabric glue to your lace or trim

Step 7:
Place the lace or trim on the ribbon and let dry

Step 8:
Add embellishments for an extra touch

Step 9:
Add a jump ring and clasp to one end of your cuff and just a jump ring to the other end

Step 10:
Put it on your wrist, go out, and let others marvel and your new accesory!
Btw, I was born with tiny wrists and giant hands.

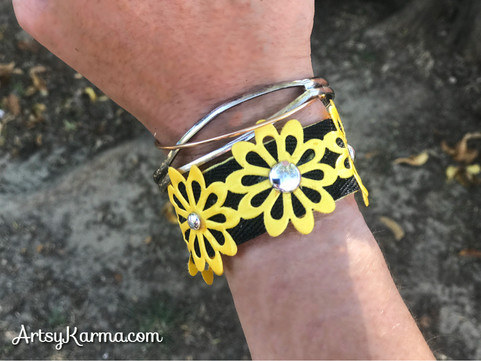


Here is another cuff i made:

For more diy cuff ideas, visit Made in a Day for more ideas.
So, what do you think?
Also, please see all my jewelry and accessories tutorials!
Buy the materials on Amazon:


Comments