
DIY Paper Tiles and Resin Make a One of a Kind Decorated Table
- Jan 26, 2022
- 5 min read
Updated: 5 days ago
In this tutorial, I’m going to show you how you can create an amazing tabletop with scrapbook paper tiles and covered with resin.
Also check out my resined chair makeover tutorial.

Who else has picked up a piece of road side furniture with the aims of repainting it and making it awesome?
I know that I have too many times. You should see my garage.
I hope that I can inspire you today to turn a thrift shop or yard sale side table into a colorful masterpiece.
How do you make a tile out of paper?
To make a square tile, the easiest way is to use a paper punch. Square paper punches come in all sizes, so depending how big you want your tiles, you can probably find a punch up to 2.5 inches or so.
However, you can use paper to make mosaic pictures and designs as well. To do that, you simply cut pieces of paper in random shapes. You would then fit them together in an intentional way that fits the paper pieces like a loose puzzle.
For example:

Your pieces of paper might not fit quite so exactly unless you cut the paper as you go. But if you precut the paper, fitting them the best you can is how most mosaics are made.
How do you make a resin table top?
Resin is so fun to use on a table or counter surface. This is because you can embed small things like paper, or even coins, into the resin and still have the surface be smooth.
You will need to add enough resin to cover them completely. You can do this in coats or if the thickness of the embedded item is small, usually one coat will suffice.
To embed paper, you’ll first need to add Mod Podge to keep the resin from seeping into the paper and discoloring it.
See how it works with paper in my tutorial below.

Bedside or end table
Spray paint
Scrapbook paper
Glitter glue
Step 1
Find a side table or whatever table you want to tile.
I recommend finding it at a non-profit thrift store, but yard sales are a good place to find old furniture too. I actually found the one below for free in an alley.

Step 2
Remove any hardware parts, such as handles or knobs, if there are any.
I ended up using a different knob that I thought went better with my color choices.

Step 3
Before you spray paint the table you’ll want to choose a color theme and pick out a variety of scrapbook paper for your tiles.
Usually if you get a pack or book of scrapbook paper the colors are coordinated so you could just use the papers that come with those. Check out the paper packs on Amazon that I recommend at the bottom of the post.

Step 4
Spray paint the table with a color that will compliment the scrapbook paper you chose.


Step 5
Find a square paper punch in the size you want your tiles to be.
I used a 1 inch square, but as I said before, you could choose any size punch you can find depending on how you want your table to look.

Step 6
Start punching out the squares of the paper you chose.
I find it easier to turn the punch over so I can see where I’m punching the paper. You will save paper that way.

Depending on the size of your table and how many different patterns of paper you’re using, you’ll have to punch the same paper multiple times.

I like to add the paper tiles at random, so I mixed them up a little bit after I punched them all.

Step 7
Before you start gluing the tiles on your table, you’ll want to line them up first to make sure everything’s even.
To do this, space out the tiles along one side of the table, like so:

And then you do the same down the other side, like this:

Step 8
Start pasting the tiles that you lined up onto the table.
I decided to use an extra strength glue stick because it worked well. But you could also use Mod Podge since you’ll need it to coat all the tiles in the next step.

After you paste down the side tiles, its just a matter of lining the rest of them up starting from the inside corner:

Step 9
Coat all the tiles with a layer of Mod Podge.
You’ll want to do this because it will keep the resin from saturating the paper which could cause it to discolor.

Step 10 (optional)
Add some glitter glue between the tiles.
I like to add sparkle to pretty much everything, so this was a must for me. I chose a red glitter glue that wasn’t too condense with glitter so that it didn’t distract too much from the tiles. Another option to add sparkle is glitter Mod Podge if you want an all over glitter look.


Once the glitter glue is dry, you’ll be able to resin.
Step 11
Measure and mix the two-part epoxy resin.
The easiest way to measure the resin is to get a silicone measuring cup made for the job. I’ve only seen the measurements be half epoxy, half hardener, but check the instructions on the bottles just to make sure.
That way you can add the epoxy to a certain level...

and then double the number you filled and then add the hardener to that amount.
For example, I filled mine 3 ounces with epoxy...

And so I added hardener to 6 oz:
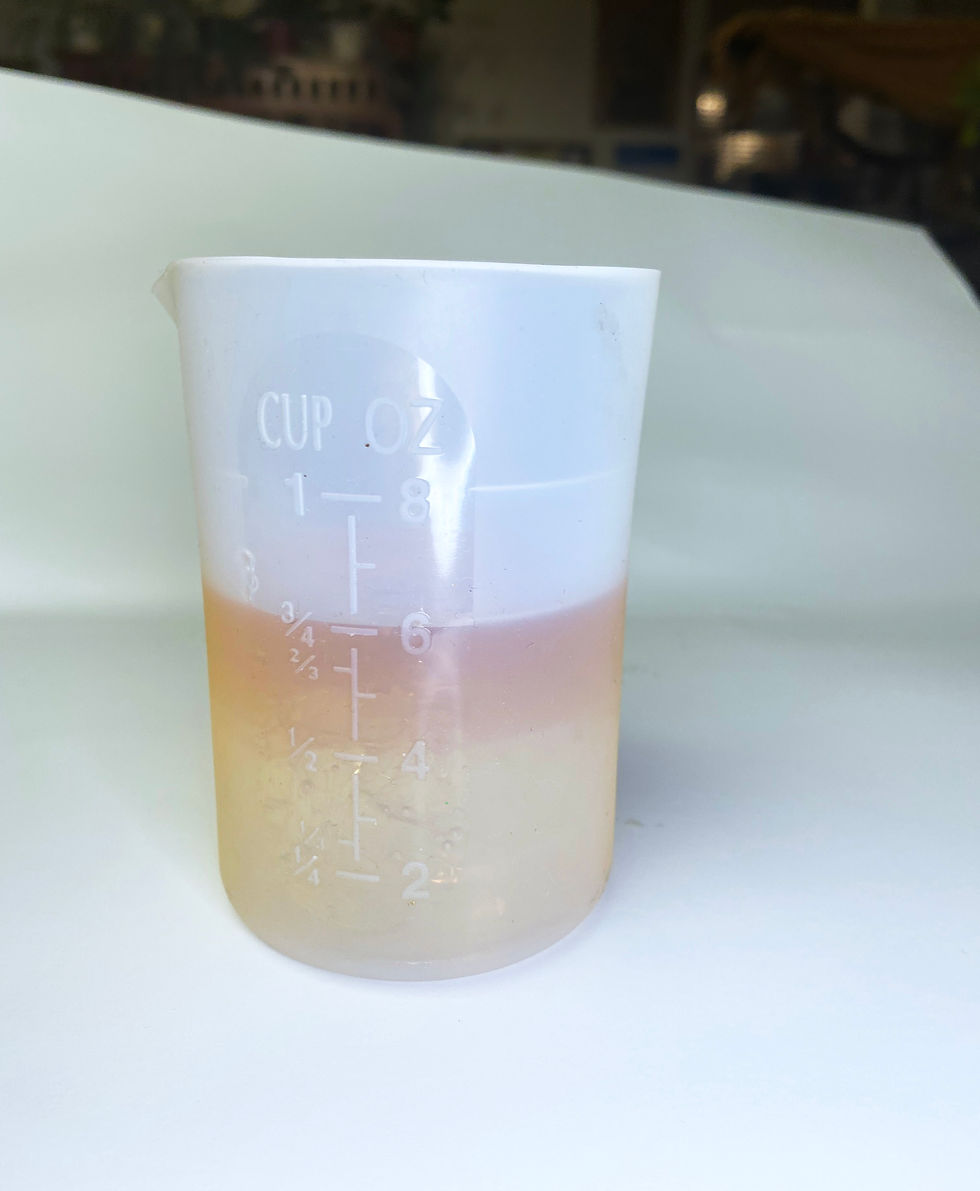
Stir up the mixture really good for about two minutes.
Step 12
After stirring vigorously for a couple minutes, pour some of the epoxy over the table top.
Don’t do this in bright sunlight because the epoxy will start to harden too quick.

Use a spatula to move the resin around to cover the whole surface.
Make sure you look closely for any spots missing resin. That happens easily.
You’ll also want to look out for any big air bubbles. Pop those with a pin if you see any.

Run the spatula along the edge of the table to avoid drips:

Let dry for a couple hours or over night.
Step 13
Replace or reattach the hardware.

When all is said and done, you should be left with an amazing, one of a kind piece of furniture you can be proud to show off.


So now it’s your turn. Make over your boring side table into a work of art that maybe just happens to match the work of art on your walls. The possibilities are endless!
Be sure to check out my tutorial on how I made this chair. I made it using acrylic paint and puffy paint and also covered it with a coat of resin:

❤️❤️❤️ Please share if you love it! ❤️❤️❤️


What a fun project!! Love the vibrant colors.