top of page

Step-by-Step Guide: Create Beautiful Custom DIY Resin Keychains at Home

  • Jun 6, 2021
  • 5 min read

Updated: Nov 27, 2025

In this tutorial, I’ll show you exactly how to make your own DIY resin keychain using acrylic tags, inkjet sticker paper, and nail polish.

I love small projects that let me incorporate a little piece of my personality or a symbol of something I like into something I make. And I imagine you probably do too.


Alternatively, instead of using symbols that are meaningful to you, you can make it for a friend with symbols that they like.


I’m excited to share it all with you.


DIY resin keychain with a purple lotus design next to the text ‘Make Your Own Unique Keychain’—tutorial cover image for custom keychain project.

Look at how awesome the Keychain above is. I’m very proud, haha.


Supplies You’ll Need for a Resin Keychain

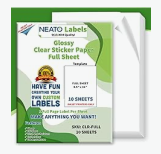
Below is an image of the sticker paper and the box of acrylic tags I bought:


Supplies for a DIY resin keychain, including clear sticker paper from Neato Labels and a kit with acrylic blanks, tassels, and key rings

The tags came with keychains and little tassels.


There are links at the bottom to get the supplies on Amazon.


Step-by-Step: How to Make a Resin Keychain:

Step 1 - Pick and resize images

Pick out some images online that you’d like to use for a keychain. Use whatever software program you have to resize them to fit on the acrylic tag you have.


I used the program GoodNotes on my iPad. It allowed me to draw a circle, and so I could see how the image would fit. But I know you can use Word to resize images. That’s how I did it pre-pad.


Design sheet in Digital Notebook with lotus flowers, galaxies, Buddha silhouette, mandala, and other images sized for making DIY resin keychain stickers


Or you can use the images in the printable PDF below when you sign up for my newsletters!!


Step 2 - Print images

Print out your image(s) on the clear inkjet sticker paper.


Printed sticker sheet with lotus flowers, Buddha silhouette, galaxies, and mandala designs for decorating a DIY resin keychain.

Put your printed images aside while you take the next steps.


Step 3 - Remove film

The acrylic tags come with a film piece adhered to both sides to prevent scratching. Remove the film on one side.


Peeling the protective plastic film off a clear round acrylic blank—DIY resin keychain tutorial step.


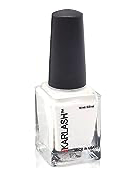
Step 4 - Paint one side with nail polish

Paint the exposed side with white nail polish. Let dry.


I found that the clear image stickers don't show up very well without a light color behind them. So, painting a white background makes the image pop. Plus, when you place the sticker on the other side, you can see the image's shadow on the white background. It's cool.


Painting a layer of white gel nail polish onto a clear acrylic blank to create a solid background—DIY resin keychain tutorial step.


I happened to use gel nail polish, which requires UV light to set, so you can totally just leave it out in the sun for a few minutes. Or, like I did, put it under a UV nail light.


UV resin curing under a blue-light UV lamp during the DIY resin keychain tutorial.

The link that says “white nail polish” in the supply list at the top will take you to the Amazon listing for the gel kind. The nail polish image link at the bottom of this page goes to regular nail polish, so you don't have to worry about any UV requirements.


Step 4 - Remove film

Now remove the other side's film.

Peeling the protective film off a clear round acrylic blank before adding a sticker—DIY resin keychain tutorial step


Step 5 - Cut out images

Pick up your printed stickers and cut out the image you want to use. Cut about a quarter-inch around the image so that it fits in your shape.


I printed many images so I could make multiple keychains and use them for other future projects.


Cutting out a printed lotus flower sticker from a sheet of designs to use on an acrylic blank—DIY resin keychain tutorial step.


Step 6 - Place sticker

Carefully place your image on the tag, being mindful of what direction you put it in so your image is right side up when dangled later.


Pressing a lotus flower sticker onto a round acrylic blank to prepare it for resin—DIY resin keychain tutorial step

Holding a round acrylic blank with a purple lotus image applied, ready for resin—DIY resin keychain tutorial step


Step 7 - Add extra embellishments

Add glitter glue or other tiny embellishments to add to your image.


Adding glitter accents to the center of a purple lotus design on a round acrylic blank—DIY resin keychain tutorial step


Step 9 - Outline with puffy paint

Go around the edge with puffy paint. You need a raised edge going around your tag to fill it with resin. There are other ways you can do this that I'll show you at the end.


Applying white dimensional paint around the edge of a lotus flower acrylic blank—DIY resin keychain tutorial step


I decided that I needed more color around the edge, so I added some more glitter glue on top of the puffy paint.


Adding pink glitter glue around the edge of a lotus flower resin charm—DIY resin keychain tutorial step


Let everything dry.


Step 10 - Cover with UV resin

Now, cover your image and everything with UV resin. Add enough so it covers the whole tag within the border you made with the puffy paint.


For a quick overview of safe handling when working with resin, Resin Obsession has a great guide


Adding a layer of clear UV resin over a purple lotus design on a round acrylic blank—DIY resin keychain tutorial step

Set your project in the sun. You won't have to wait too long. I gave mine an hour just to be sure.


For a quick intro to UV resin specifically, this tutorial walks through the basics


Here's after mine dried:


Finished resin keychain charm featuring a purple lotus flower design with a pink glitter border—DIY custom resin keychain tutorial step

I decided to go all out for this keychain, so I also added a layer of sparkle pink nail polish to the back over the white nail polish:


Painting a white acrylic keychain blank with pink glitter nail polish for a resin keychain—DIY custom keychain tutorial step


Step 11 - Cover the back with UV resin

Lastly, I also added a coat of UV resin to the back over the nail polishes to make it extra durable.


Applying UV resin to a painted acrylic keychain blank with a brush—DIY resin keychain tutorial step


Step 12 - Attach a key ring

Attach the keychain using a jump ring.


DIY resin keychain assembly showing a silver keyring attached to a clear resin charm with a purple lotus design—custom keychain tutorial step.


Step 13 - Add beads or tassels

You can add a tassel (especially if you bought the kit with them included) and some beads to an eye pin.


DIY resin keychain tassel charm being assembled with pink and orange beads and a gold cap—custom keychain tutorial step


Attach the beads and tassel to the keychain, and now you've got an amazing custom keychain!


DIY resin keychain with a purple lotus flower design, glitter border, and beaded tassel charm—custom keychain tutorial


I gave this lotus keychain to a dear friend from our temple. A lotus 🌺 is symbolic in Buddhism as it stands for rising through the muck and emerging as something beautiful, representing how we as beings can rise through the muck of suffering and become enlightened✨.


Creative Variations You Can Try Next


Add Dried Flowers or Leaves

Pressed flowers, tiny leaves, or herbs look beautiful sealed under resin. They’re perfect for botanical, nature, or cottagecore-themed keychains.


Try a Galaxy or Glitter Background

Use alcohol inks, mica powders, or fine glitter to create a dreamy galaxy swirl or a sparkling backdrop behind your image.


Layer Your Design for a 3D Effect

Pour a thin layer of resin, cure it, then add your image and another layer. This creates a dimensional “floating” look inside the charm.


Make It Double-Sided

Add a design to both sides of the acrylic blank—like a symbol, quote, or pattern—so the keychain looks great from every angle.


Add Words or Short Quotes

Print tiny inspirational words, such as “breathe,” “shine,” or “be kind,” to layer under your resin for a meaningful touch.


Tint the Resin Itself

Add a touch of alcohol ink or mica to tint the resin a soft color. This works especially well with crystal clusters, mandalas, and butterflies.


Create a Matching Tassel or Bead Charm

Add beads, crystals, or tassels that match your artwork (like I did) to make the whole piece feel polished and intentional.


Make a Themed Keychain Set

Try a floral set, galaxy set, woodland animals, pastel cottagecore, zodiac, or spiritual symbols. They make great gifts and are fun to mix and match.


But don't go away! I made two more that I want to share.


Here is the other Buddhist keychain I made. I plan on giving it to our temple to give as a gift to traveling monks and teachers.


DIY custom resin keychain with a meditating Buddha silhouette, jeweled tree design, multicolored beads, and black tassel charm.

I used tiny rhinestones as jewels in the bodhi tree above Buddha. I also used a green paint pen instead of white nail polish for the background. Not only that, but I used black puffy paint as the border.


And here is my galaxy keychain:


Custom resin keychain with a blue galaxy design, gold stars, glitter details, beaded border, and tassel charm—DIY resin keychain project

I made it by adding Sparkle Mod Podge to the acrylic tag before the nail polish. I also added rhinestones and tiny star nail embellishments. I also used a rhinestone chain as the border.


I would love to hear what you guys think about these DIY keychains and if any of you plan to try the project out. Let me know in the comments.


Also, please see all my jewelry and accessories tutorials!


Please share to Pinterest if you ❤️ it:


Collage showing resin keychain tutorial with two finished keychains and step-by-step images using stickers and resin.
DIY custom resin keychain with galaxy design, gold star accents, and blue tassel charm.


Comments


What do you think? (140)
Guest
32m ago
ree

Một nền tảng có nhiều danh mục giải trí cần đảm bảo sự liên kết giữa các phần để tránh rời rạc trong quá trình sử dụng. Với cấu trúc của yo88, các nội dung từ game bài, casino live, xổ số đến bắn cá và đá gà được tích hợp trong cùng một hệ thống vận hành. Việc chuyển đổi giữa các khu vực không yêu cầu thao tác phức tạp, giúp duy trì trải nghiệm liên tục. Các yếu tố như hình ảnh, dữ liệu và phản hồi được đồng bộ trong từng danh mục


Guest
14h ago
ree

Cách vận hành thực tế của một nền tảng thường ảnh hưởng trực tiếp đến trải nghiệm khi sử dụng lâu dài, đặc biệt khi người dùng tham gia nhiều phiên liên tục. Khi hệ thống không đồng bộ, thao tác sẽ dễ bị gián đoạn. Với cách triển khai tại zowin, các danh mục được đặt trong cùng một cấu trúc hiển thị nên việc truy cập diễn ra trực tiếp. Trong đó các game bài 3D như Phỏm, Sâm Lốc được xây dựng theo dạng người chơi thật. Tôi nhận thấy việc tham gia bàn diễn ra nhanh và không bị chờ đợi lâu, giúp giữ được nhịp chơi ổn định


Tg88
14h ago

Trong quá trình sử dụng lâu dài, mình thường chú ý đến việc hệ thống có duy trì được sự ổn định khi mở rộng nhiều nội dung hay không vì số lượng game lớn dễ gây quá tải nếu không tối ưu tốt, nhìn thực tế thì Tg88 phát triển kho game đa dạng từ thể thao đến bắn cá nhưng vẫn giữ được hiệu suất xuyên suốt, khi trải nghiệm mình có thể bắt đầu từ bắn cá, chuyển sang game bài, thử thêm nổ hũ rồi quay lại Blackjack mà không cần tải lại nên cảm giác chơi luôn trơn tru

ree


Guest
15h ago
ree

Quy mô hoạt động thường phản ánh rõ khả năng duy trì của một nền tảng trong thời gian dài, đặc biệt khi liên quan đến lượng người dùng và hạ tầng hệ thống. Tôi thường chú ý đến server và tốc độ xử lý vì đây là yếu tố dễ gây gián đoạn nếu không được đầu tư đúng mức. Khi phân tích go88 hệ thống cho thấy sự ổn định nhờ hạ tầng đặt tại châu Á, xử lý nhanh và hỗ trợ tốt trên nhiều thiết bị. Sau đó, các nội dung như slot, thể thao, bắn cá và mini game được tích hợp đầy đủ trong app lẫn web. Điều này giúp việc sử dụng không bị phụ thuộc vào thiết bị và giữ được sự liên tục trong trải nghiệm


Guest
18h ago
ree

Hệ thống hỗ trợ người dùng đóng vai trò quan trọng trong việc xử lý các vấn đề phát sinh khi sử dụng nền tảng cá cược trực tuyến. Khi có đội ngũ chăm sóc hoạt động liên tục và phản hồi nhanh, các sự cố liên quan đến tài khoản hoặc giao dịch sẽ được giải quyết kịp thời, 789f duy trì dịch vụ hỗ trợ 24/7 nhằm đảm bảo người dùng luôn có kênh liên hệ khi cần thiết. Song song đó, các nội dung như live game tương tác, trò chơi trực tiếp và các hình thức giải trí thời gian thực giúp tăng sự kết nối trong quá trình tham gia


b0966231
19h ago

Tối qua mình đọc các bình luận trao đổi trên một diễn đàn, mình bắt gặp HITCLUB được chèn vào giữa câu chuyện. Mình bấm thử xem cho biết, chủ yếu là để xem cách trình bày và cấu trúc nội dung. Lướt nhanh thì thấy tổng thể khá gọn gàng, tạo cảm giác đáng tin cậy. Xem xong mình quay lại đọc tiếp các bình luận khác, chứ cũng không đào sâu thêm


b0966231
19h ago

Tối qua mình đọc các bình luận trao đổi trên một diễn đàn, mình bắt gặp GO88 được chèn vào giữa câu chuyện. Mình bấm thử xem cho biết, chủ yếu là để xem cách trình bày và cấu trúc nội dung. Lướt nhanh thì thấy tổng thể khá gọn gàng, tạo cảm giác đáng tin cậy. Xem xong mình quay lại đọc tiếp các bình luận khác, chứ cũng không đào sâu thêm


b0966231
19h ago

Tối qua mình đọc các bình luận trao đổi trên một diễn đàn, mình bắt gặp SUNWIN được chèn vào giữa câu chuyện. Mình bấm thử xem cho biết, chủ yếu là để xem cách trình bày và cấu trúc nội dung. Lướt nhanh thì thấy tổng thể khá gọn gàng, tạo cảm giác đáng tin cậy. Xem xong mình quay lại đọc tiếp các bình luận khác, chứ cũng không đào sâu thêm


b0966231
19h ago

Tối qua mình đọc các bình luận trao đổi trên một diễn đàn, mình bắt gặp B52 được chèn vào giữa câu chuyện. Mình bấm thử xem cho biết, chủ yếu là để xem cách trình bày và cấu trúc nội dung. Lướt nhanh thì thấy tổng thể khá gọn gàng, tạo cảm giác đáng tin cậy. Xem xong mình quay lại đọc tiếp các bình luận khác, chứ cũng không đào sâu thêm gì nữa.


b0966231
19h ago

Tối qua mình đọc các bình luận trao đổi trên một diễn đàn, mình bắt gặp HITCLUB được chèn vào giữa câu chuyện. Mình bấm thử xem cho biết, chủ yếu là để xem cách trình bày và cấu trúc nội dung. Lướt nhanh thì thấy tổng thể khá gọn gàng, tạo cảm giác đáng tin cậy. Xem xong mình quay lại đọc tiếp các bình luận khác, chứ cũng không đào sâu thêm

Subscribe to My Website. I let you know when new projects posted 😁

Thanks for subscribing!

Disclamer

I am a participant in the Amazon Services LLC Associates Program, an affiliate advertising program designed to provide a means for me to earn fees by linking to Amazon.com and affiliated sites

My recent posts:

bottom of page